


Alice Medrich is known for being the queen of all things sweet and in her newest cookbook, Flavor Flours, she bakes a plethora of treats using wheat-free alternative flours. Medrich takes on teff, buckwheat, sorghum, chesnut flour and other ancient flours and transforms them into dynamic desserts. The book is organized by flour with information on its flavor and how it behaves in baked goods. Medrich outlines her innovative baking techniques to work with this new set of gluten-free flours and discusses how to experiment with them in the kitchen. With over 125 recipes to choose from, the gluten-free baker will be hard pressed not to find a favorite. Simple and straightforward recipes like crepes, waffles or brownies share the space with more pronounced goodies like white rice chiffon cake and ricotta cheesecake. This cookbook is not just for gluten-free eater but anyone who enjoys tinkering in the kitchen.
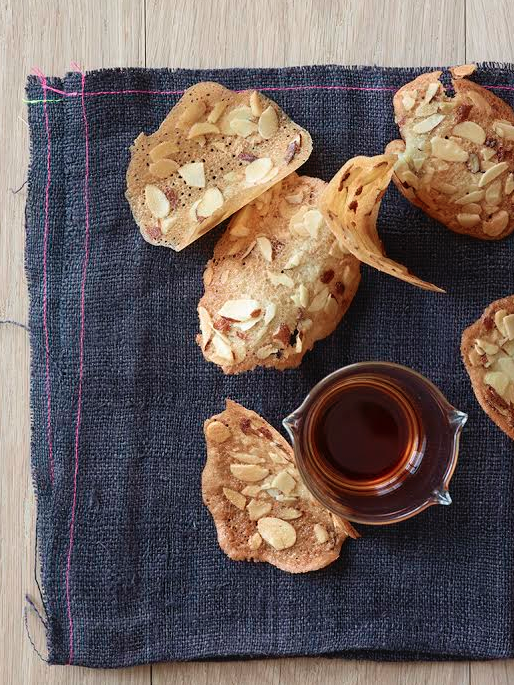
Almond Tuiles
Makes about forty 3-inch cookies
Crispy, crunchy almond cookies are elegantly thin and buttery. They partner perfectly with creamy desserts like custards, pudding, and ice cream. Rice flour plays a neutral role here, allowing the flavor of butter and almonds to shine. Classic tuiles are cooled over a rolling pin (see the sidebar on page 69 for methods, including a shortcut) to make them resemble the roof tiles they are named for, but you can also skip that step and make them flat.
4 tablespoons (1/2 stick/55 grams) unsalted butter, melted, plus more for greasing the foil
2 large egg whites
2 teaspoons water
1/2 cup (100 grams) sugar
3 tablespoons (30 grams) white rice flour or scant 1/3 cup (30 grams) Thai white rice flour
1/4 teaspoon pure almond extract Scant
1/2 teaspoon salt
2/3 cup (70 grams) sliced almonds Equipment 2 baking sheets Silicone baking mats (optional) Rolling pin or small cups for shaping (optional)
1. Line the baking sheets with regular foil (dull side facing up) or silicone mats and grease the foil or silicone lightly but thoroughly, or line the sheets with nonstick foil, nonstick side up (see Note).
2. In a medium bowl, mix the egg whites with the water, sugar, rice flour, almond extract, and salt until well blended. Stir in the butter and almonds. Cover the bowl and let the batter rest for several hours or overnight in the refrigerator to let the flour absorb moisture.
3. Position racks in the upper and lower thirds of the oven (or one rack in the center if you are baking only one sheet at a time) and preheat the oven to 325°F.
4. Stir the batter. Drop level teaspoons 2 inches apart on the lined baking sheets. Use the back of the spoon to smear the batter into 2½-inch rounds—tuiles baked on greased foil will spread a little; those baked on silicone or nonstick foil will not. Bake, watching carefully, for 12 to 15 minutes, rotating the sheets from front to back and top to bottom about halfway through the baking time, until the tuiles are mostly deep golden brown. If the cookies are not baked enough, they will not be completely crisp when cool, nor will they come off the foil easily.
5. Slide the foil sheets onto racks and let the cookies cool completely before removing them. Or, if using silicone mats, transfer the hot cookies to a rack to cool.
6. To retain crispness, put the cookies in an airtight container as soon as they are cool. They may be stored airtight for at least 1 month
Note: Tuile batter baked on greased foil spreads in the oven, making slightly irregular-shaped cookies with thin, delicate edges. The batter will not spread on nonstick foil or silicone mats, so you must spread it to the diameter that you want before the sheets go into the oven. The edges of the tuiles will not be as delicate as those baked on foil, but they will hold their shapes.
Shaping Tuiles To make traditional curved tuiles, you must shape the cookies while they are still hot, so you might want to bake only one sheet at a time until you get the hang of it. For silicone mats: Slide a small metal spatula under each cookie immediately, or as soon as you can do so without deforming them. Drape cookies over a rolling pin (anchored so it will not roll) or into custard cups or any small container that will give them an interesting shape. Move the cookies to a cooling rack when they are cool enough to keep their shape. Repeat until all of the tuiles are shaped. (If the cookies become too brittle, return them to the oven for a couple of minutes until they are hot and flexible again.)
Tuiles baked on regular foil tend to stick until they are completely cool, so use this trick for shaping a whole sheet at a time: Grasp the edges of the foil as soon as the sheet comes from the oven (without touching the hot pan or the cookies) and roll the foil into a fat cylinder, gently curving the attached cookies like potato chips. Crimp or secure the foil with a paper clip. When cool, unroll the foil carefully and remove the tuiles.
Excerpted from Flavor Flours by Alice Medrich (Artisan Books). Copyright © 2014. Photographs by Leigh Beisch.
Image Sources:


