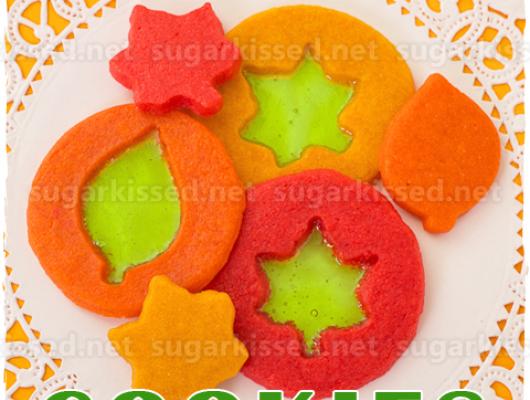
Stained Glass Leaf Cookies
Ingredients
Your favorite sugar cookie recipe
Circle cookie cutter
Mini leaf cookie cutter(s) (smaller than your circle cookie cutter)
Orange, yellow, red and ivory gel food coloring
Green hard candy (such as Jolly Ranchers)
Mini 2-in-1 cookie scraper (a.k.a. boo boo stick) or toothpicks
Preparation
1
Once you have prepared your sugar cookie dough, separate it into three equal sections. Add a few drops of red and ivory coloring to the first section, orange and ivory to the second, and yellow and ivory to the third. Knead each section of dough until the coloring is spread evenly throughout. Note: you will want to wear gloves when kneading the dough, unless you want to walk around looking like a henna tattoo on your hands went horribly wrong.
2
Next, roll out each section of dough to your desired cookie thickness. Use your cookie cutters to cut the dough into circles, each one with a leaf cut out of the center. Place the cut dough on a parchment lined cookie sheet and set it in the freezer for about 15 minutes before baking. You can bake the cutout leaf centers separately to make matching mini colored leaves.
3
While your cut dough is enjoying some chill time in the freezer, prepare your candy for the stained glass centers. Unwrap all of your green hard candy (I used Jolly Ranchers. Life Savers are another popular choice.) and place it in a sealed Ziploc bag. Next, take out all of your day’s frustrations by smashing the candy with a kitchen mallet or rolling-pin until you have a bag full of tiny candy pieces.
4
Remove your chilled dough from the freezer and bake until the dough is just set. This will probably be half the total baking time that your recipe calls for. (I baked mine for four minutes.)
5
Remove the cookies from the oven and carefully scoop a small amount of candy into the leaf center of each one. The candy will melt and spread so you do not need to completely fill the area. Keep in mind that anywhere you drop candy, it will melt and spread. I kept a pair of tweezers (clean, “for food only” tweezers) handy so I could remove pieces of candy that I dropped on top of the cookies.
6
Set the cookies back in the oven to bake for the remaining amount of time. (I baked mine for an additional four minutes.)
7
Remove the cookies from the oven and use the pointy end of your boo boo stick, a toothpick, or sharp knife to pop any large unwanted bubbles in the candy. You will need to move quickly as the candy will start to harden and stick to anything it touches.
8
Let your leaf stained glass cookies completely dry before storing or stacking them. Keep in mind that the candy will be sticky. Take it from me, you do not want to set them on a paper towel at any point. I had no problem stacking them on sheets of parchment paper once they had completely cooled.
.
About
Stained glass cookies create a stunning and tasty display. Learn step-by-step how to make these simple beauties.
Added:
Sunday, November 25, 2012 - 6:43pm


